


- Concept
- Collaboration
- Customization
- Completion
Every Commission Entails the 4 C’s.
1. Concept
Start with a CONCEPT, an idea. This involves coming up with something you want to conceptualize and make it a permanent fixture in your household. This usually takes the form of text or a picture. This is completely up to YOU to decide, whether its an old friend or pet, mascot from the glory days of college, or something a little more profound than “live, love, laugh”. The desire of what art you wish to imbue is almost limitless.
2. Collaboration
After you have figured out what you want to immortalize, now YOU bring that concept to ME and we COLLABORATE.
One of the first concepts or choices we discuss is the selection of graphic you wish to include. Let’s take a look at these two images.
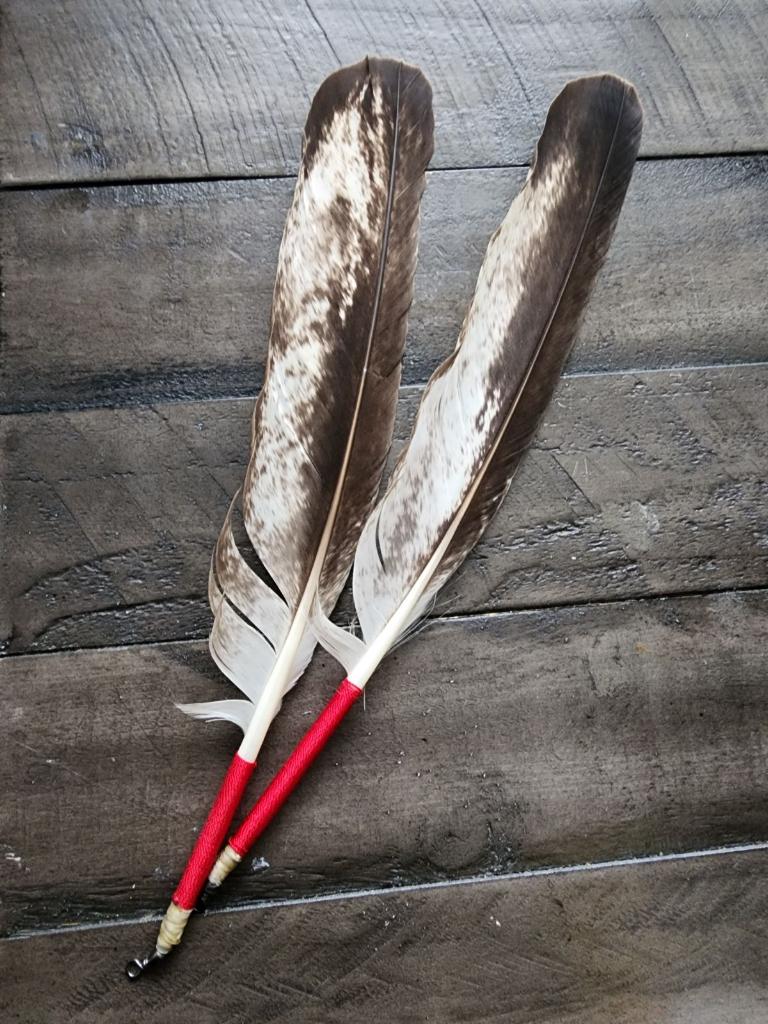
Client’s selection

Recommendation
On the left we have an image of two feathers. This is a very high quality image with a lot of details, and a lot of meaning to the client. However, this is the type of image that would be hard to render with high accuracy and detail in the software used to etch out designs in wood for either a wood or epoxy inlay. However, this wouldn’t be such an issue for laser engraving.
On the right, there is a vector graphic. Easier to edit digitally and simple enough to get an image to transfer to which ever medium we choose to use. This type of graphic can be used by most of the tools I use to create custom art works.
Ultimately, it’s up to YOU to decide your preference. Once the media is chosen, it is now time to choose the medium.
Every Tree Has It’s Day! To start off there are domestic woods and exotic woods; soft woods and hard woods; this grain or that grain. There are a lot of choices to consider with selecting the wood. The most obvious is by vision, or what it looks like. This online lumber yard goes into great detail about the different types of wood, including hardness, durability, workability, etc.
End-grain vs edge-grain!! This is a big one. So big that I won’t go into detail as there is a lot of information across the web that I would simply not due justice. I do describe in some detail below.
End-Grain
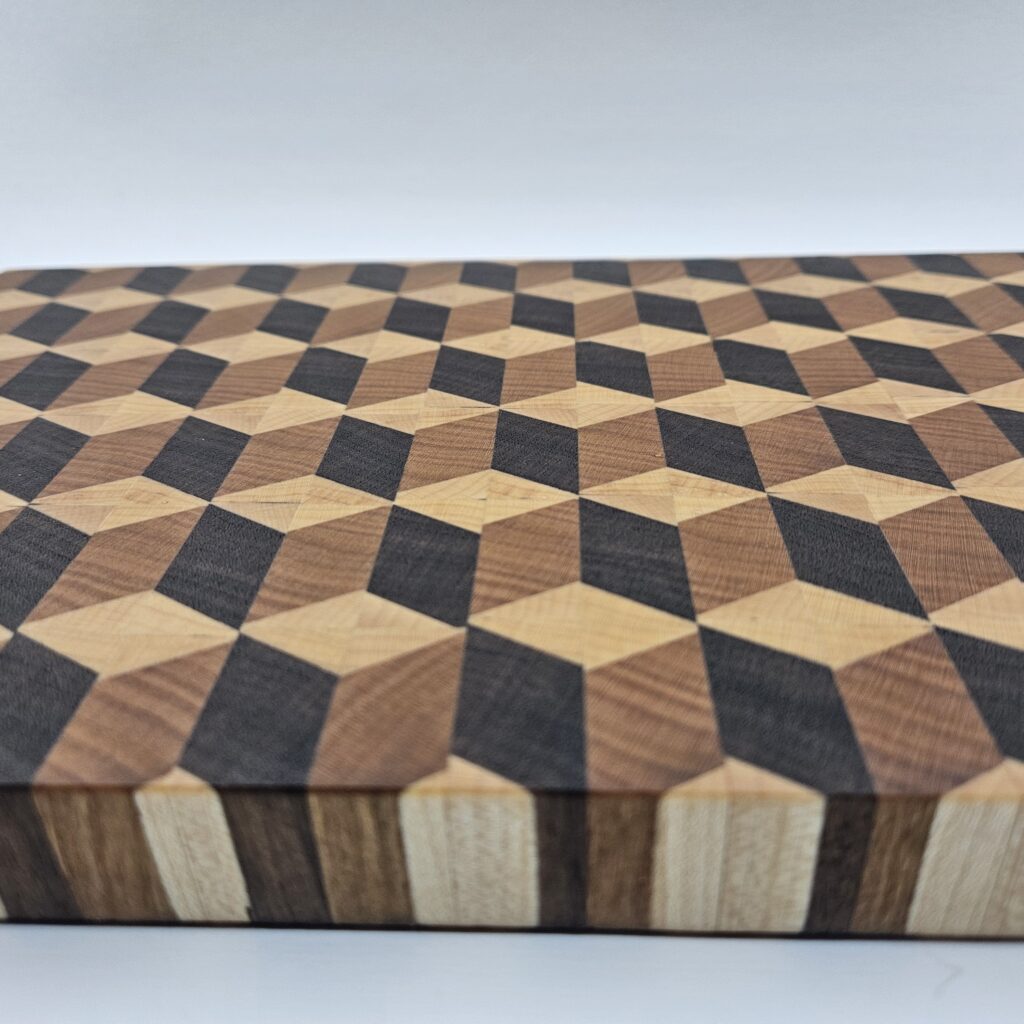
Very stark and prominent features of the grain are visible with end-grain
End-Grain boards are composed of boards where the direction of the fibers are all point orthogonal, or at a 90 degree to the surface. I like the analogy of wood fibers being like straws. If you take a whole bunch of straws, shrink them then cut them to where you have a board made of up many of those straws, that’s an end-grain cutting board. A lot of cutting boards should be end-grain, due to the nature of end-grain composition. A knife will cut through whatever is on the board, and as well as through the wood. The blade of the knife will slip between the “plastic straws” more so then cutting the plastic straws. And because those straws are nicely packed together, the straws or fibers will come back together and mend themselves. This is why end-grain boards are the preferred grain for cutting boards.
Edge-Grain or Face Grain
Offer’s its own unique beauty when certain combinations and contrasts of wood are used with face-grain
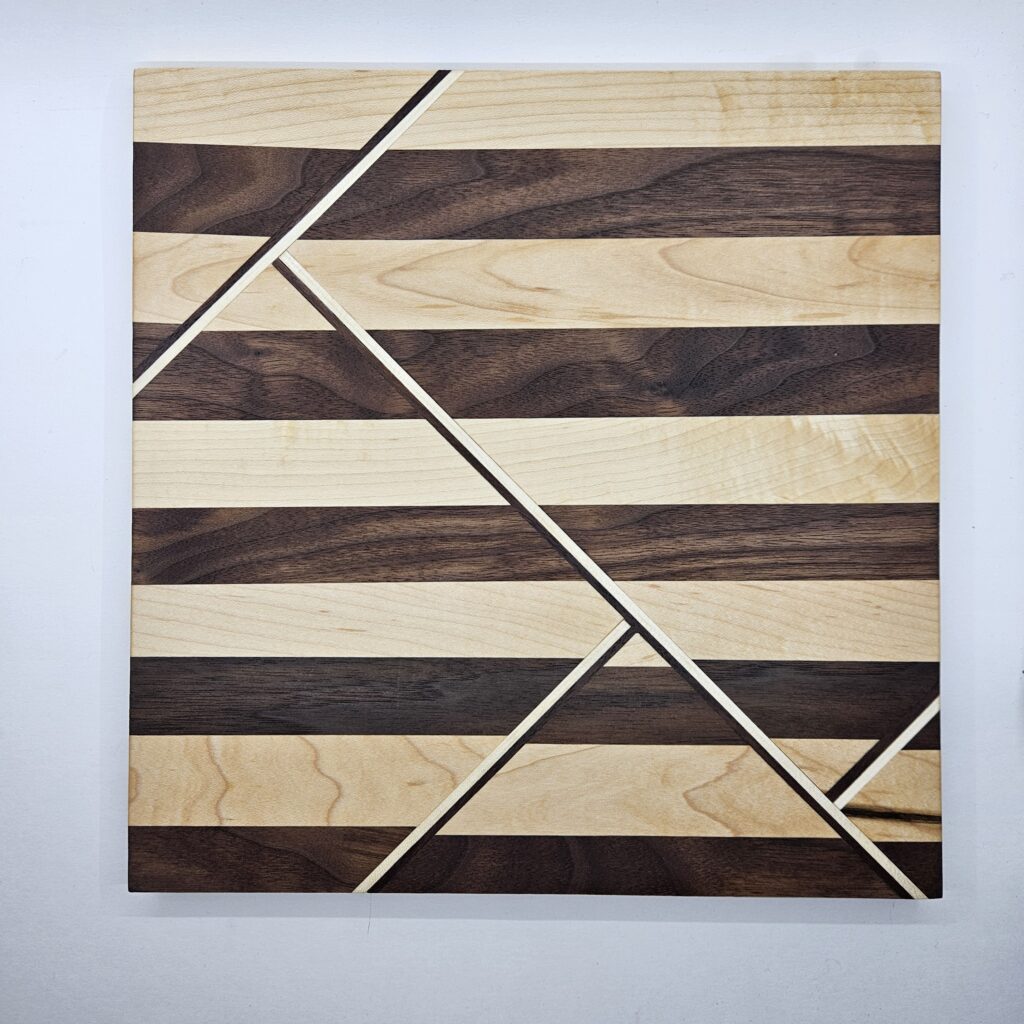
In this scenario, the straws mentioned before from End-Grain, are now parallel to the surface or laying on top of one another. If you slice into this configuration of straws, you don’t get the same healing properties you do with end-grain. I think using these type of boards as serving or charcuterie boards will preserve the boards for much longer. These boards are typically much easier to construct than end-grain boards.
3. Customization
Now that YOU have the big picture of what you want, it’s time to get into the nitty gritty details. During this phase of the commission process, there will be back and forth, allowing you CUSTOMIZE details along every step of the way. This will be just as much a work of mines, as it is a work of YOU.
Size – How large/thick do you want the board to be.
Edging – Which still of edges do you prefer. Straight, rounded, curved, beveled.
There are many details to plan out throughout the process. Add-ons are welcome, or keeping it simple and clean looks just as nice. This is for you to decide.
4. Completion
It’s not over until it’s over. Before the project is complete, both parties need to be satisfied. Pictures, videos, zoom calls, what ever it takes to make sure everyone is happy in good faith.